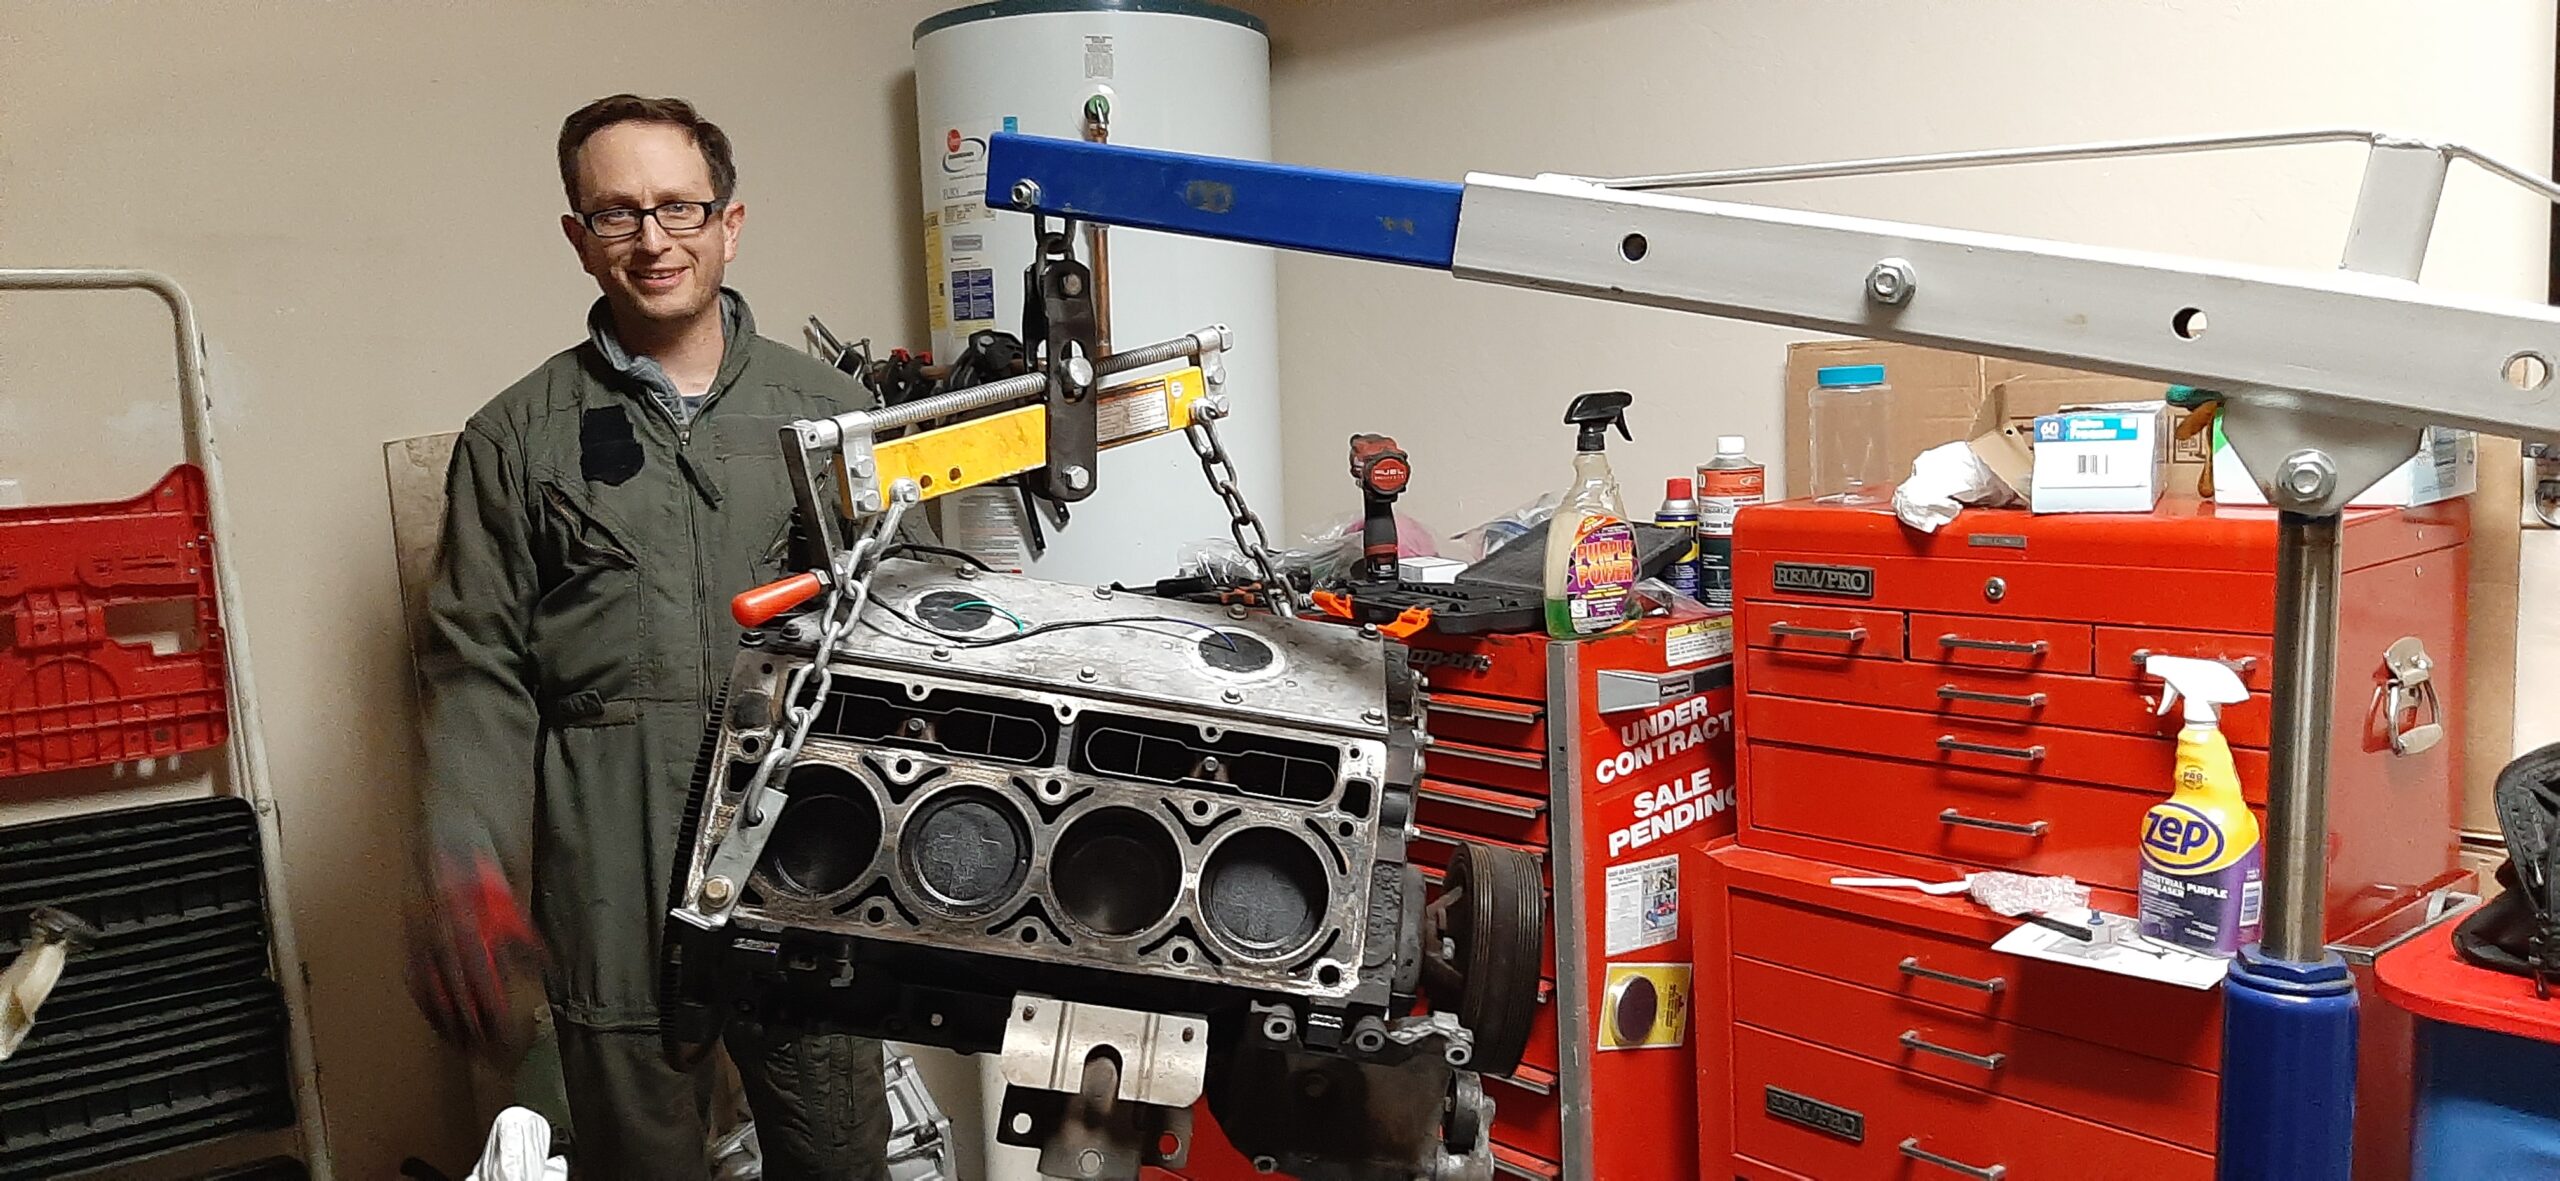
My plan since buying my 2001 Tahoe had been to swap in a 6.0L engine. The truck decided to make that decision for me when it shot a rod through the side of the block. I’d originally planned to do a junkyard 6.0L swap, but couldn’t find one. Roughly $8,000 later I had a custom LQ9 build. Read further to learn how I built the motor.
Build sheet
Some parts were sourced from my old 5.3L, some purchased new, and others were used LQ9 parts. I chose the later LQ9 spec due to a small bump in compression ratio over LQ4 and full floating piston wrist pins. My goal wasn’t to build a horsepower monster rather a engine that could outperform stock LM7 across the board while optimizing low end torque. Basically the best all round naturally aspirated Gen III truck motor possible.
LQ9 Spec Parts
- 6.0L Gen III Iron Block
- 317 LQ9 Heads
- Polished combustion chambers
- Polished exhaust runner
- Connecting rods
- Pistons
- Stock spec re-ring kit
- Stock spec bearings
- Composite head gaskets (buy MLS if you build)
- OEM Head Bolts
Reused LM7 5.3L Parts
- Crankshaft
- Intake Manifold
- 78mm throttle by cable throttle body (versus 80mm LQ9)
- P01 0411 PCM (segment swapped config from LQ9 Escalade)
- 80mm Mass Air Flow Sensor (Same on LQ9)
- 58PSI Fuel Pressure Relator (Same on LQ9)
- OEM 140LPH Fuel Pump (Same on LQ9)
- Ignition Coils
- Exhaust manifolds
- Entire exhaust system
Aftermarket Parts
- OEM Flex Fuel Injectors from L59 5.3L
- Required spacer kit for fuel rail from ITC Billet
- Approx 36.6 lb/hr at 58 PSI in LQ9 versus 33 at 50PSI in L59
- Up from LQ9 25.2 lb/hr injectors
- Required harness adapters
- Yella Terra Ultralight 1.7:1 Rocker Arms
- Shaft Mount
- Roller rocker & tip
- Johnson LSR2116 Lifters
- Slow Leak Down
- Short Travel
- Link Bar
- Required custom length pushrods…
- Custom ordered Manton Series 3 Pushrods
- 11/32″ OD with 0.120″ ID (versus LQ9 0.3125″ ID)
- Three piece design
- Vinci custom camshaft M/T #562 0.578/0.587/213/220+4A
- Vinci SS/SK Dual Valve Springs with hardened seats & locks
- Melling factory spec oil pump (didn’t go with high pressure pump)
- Metal oil galley plug
- Summit Racing branded SFI Rated Flex Plate
- ARP Fasteners
- Tucson Alternator 8292ND240 High Output Alternator
- 257 Amps Max output / 3445 Watts
- Big three 1 gauge wire upgrade
- Banks Cold Air Intake
Additional, considerations…
Intake Manifold & return less fuel system
The Trail Blazer SS intake manifold is a popular swap when building a Gen III Small Block Chevy. I partly decided to stick with the original LM7 intake (I think maybe same part at LQ9 intake) due to fitment. I believe the Trail Blazer SS Intake uses a different fuel rail for return less system and I wanted to keep my return style fuel system.
It’s also worth noting I tried swapping in a 340LPH pump and wasn’t compatible with a return style / OEM sending unit basket but it may work with a return less system. The return less system modulates flow where as return system always flows at the pump capacity. That high flow rate sucks the basket dry of fuel in a return style setup. I’m stuck at around 400hp with the factory 140LPH fuel pump so eventually I may need to visit this issue. Especially if I do the following upgrades…
Dream Build
Heads I’ve been drooling over a set of Airflow Research 215cc Mongoose Heads. I hear they are vacuum monsters and would potentially improve my low end torque. There was some debate at the machine shop where they had a CNC program to custom machine my 706 LM7 heads for my 6.0L build. I’d have been inclined but the increased compression using 5.3L heads on my 6.0L would have possibly warranted a premium fuel only build which I wanted to avoid. I used a set of 317 LQ9 heads for the build as a result. I don’t believe the AFR heads require premium fuel either.
Pistons I’m enamored by Speed of Air pistons. I’d LOVE to try a set out but is hard to warrant a tear down to put in pistons that cost thousands of dollars (versus a couple hundred for OEM design). However, I understand they increase performance by roughly 15% while reducing combustion temperature (mitigating knock / pre-detonation risk).
It’s worth noting I’m NOT a fan of the LQ9 wrist pin retainer clips. I’d highly encourage an aftermarket pistons for better retainer clip design. I bought BRAND new clips but I couldn’t help but wonder if they are fully seated and or could work their way out.
Gapless Piston Rings they now make gapless piston rings for these engines. I’d 100% have gotten those had they been available at the time. In theory they retain more pressure in the combustion chamber increasing efficiency.
LS1 Crankshaft I regret not using an LS1 crankshaft. They are rifle drilled to reduce weight. Also I’d seen quite a few for sale second hand. The dimensions are identical to the LQ9 crankshaft as well.

Oil Squirter Piston Rods I got a rare set of factory cast oil squirter piston rods (pictured above). These use oil to cool the piston. There’s a small cut on the rod end directing oil from the bearing to the bottom of the piston. I couldn’t find any information on them so I sold them. In hindsight they would have been excellent to mitigate / lower piston temps and reduce risk of engine knock.
Radiator Cold Case is a company that makes a factory fitment, drop in, dual row radiator. I’d buy the one with oil cooler, RAD-GMT569A, and install an oil cooler on my engine too. I wish I’d known about it when I originally purchased my radiator as I would have bought it. However, now I have a newish OEM radiator I’d have to throw away. The LQ9 and LM7 reference the same radiator in the parts catalog but I can say the LQ9 creates MUCH more heat. I’ve been dancing around buying one of these dual row radiators just cause for a long time now.
The build process
Balancing I had Racer’s Edge Machine shop in Tucson, Arizona balanced my rotating assembly. They are AWESOME. I HIGHLY recommend checking them out NOMATTER where you are building. He knew the setup inside and out. I probably should have considered a line hone on the mains but didn’t think about it till after the engine was built.

Head Job did a standard head job, deck was resurfaced, new guides, valves & seats ground (or replaced?). I polished the combustion chambers and exhaust runners on my own prior to getting heads rebuild. It’s simple to do, although a bit time consuming. I regret not port matching the combustion chamber size. It’s fairly simple to do and I didn’t think about it at the time.

Exhaust runner prior to polishing

Exhaust runner after polishing

Cylinder head after machine shop work, exhaust runner & combustion chamber polishing
Piston Rings I bought Molly brand rings. I called their tech support with questions on gapping. They said the rings needed no gapping (came pre-gapped for LQ9). I wasn’t comfortable with this. After consulting the machine shop they said better safe then sorry so I gapped my rings. This maybe a moot point if you use gapless rings?

Custom Ground Camshaft originally I was researching RV camshafts which I understand produce a lot of low end torque. However, I didn’t like idea of sacrificing top end power so I found Xtreme profile truck camshafts. I dug deeper into them and was afraid of valvetrain harmonics, the lobe could easily produce valve float at higher RPM(s) with a lower pressure spring (I didn’t want high pressure springs). Long story short, I was afraid the profile would be hard on valve train. I spoke with Roger at Vinci performance and he understood my concerns exactly. He had designed a cam specifically for what I wanted and ground it for me! All for the same cost as aftermarket. Best part of building the engine was by far working with Roger to spec a custom camshaft!

Assembly
I had a bought a engine hoist on Craigs List and a Harbor Freight Engine stand. Yeah the engine stand sucked but it did work! Couldn’t complain, I think I got it for $50 new. Outside of measuring pushrods (more below) it only took a few hours to assemble the motor over several weeks. Had to milk the fun!
PREVENT RUST! I took a couple weeks to carefully assembly my motor. All the while, I kept it on the engine stand. I’d spray it down with WD-40 to prevent rust from forming, especially on deck and cylinder walls. I also stuck a garbage bag over when not working on it. It’s vital you do this, as the cleaner the engine is the better your build will be!

Above you can see the Johnson 2116LSR lifters I installed next to a factory lifter from teardown. I did buy the Johnson Lifters used. I found a guy who didn’t like them so sold them to me for less than a set of OEM LS7 style lifters.
My main goal was to get a high quality lifter with link bar design. I DO NOT like plastic factory lifter trays! I theorize this is source of lifter failure people complain about and NOT the lifter itself. I digress…
It’s also worth noting, the valve train is the heart of your engine. That’s where I spent my money. A good lifter is critical to engine reliability. There’s LOTS of knockoff lifters out there. You want a REPUTABLE brand from a REPUTABLE source. Johnson has knockoffs but the Johnson brand is one of the best brands you’ll find. There’s also Morel lifters and some others I had considered. Be CAREFUL you source a high quality lifter!
Valvetrain Hell I had bought the most insane lifters on earth, LSR2116 Johnsons! They look like jewelry when you get them are rated for 8500 RPM, and are basically solid lifter performance from a hydraulic lifter. The crux is the preload has to be within 0.01″ versus 0.10″ for LS7 style OEM lifters! The lifter piston is also deeper so you need longer length, custom pushrods! Each lifter must be carefully measured to get the correct length. I originally build the engine with a brass rocker arm trunnion kit. These lifters DESTROYED the brass trunnions so I bought the Yella Terra Rocker arms. That meant I had to measure the pushrod length twice! It took about 40 hours to do each time. The second time I bought an MS Racing Components EZ checker / adjustable pushrod. If you get custom length pushrods you 100% need to buy that tool.

Here’s a view of those good looking Yella Terra Rockers! It’s hard to leave the valve covers on these look so nice! Every so often I’ve had to pull the covers and a set of rockers off to ensure oiling on valve stem is adequate. One fear with the Johnson Lifters was getting enough volume of oil to the valves with the smaller lifter piston design. So far so good, I’ve put a about 40,000 miles on the engine.
It is important to note, the engine is VERY easy to fit into the engine bay with lots of excess room. However, angling it in is WAY easier if you don’t have the intake manifold on. I also removed the core support. Sliding the engine back in was a breeze! Plus I refurbished the core support while I had the engine out.

Lessons Learned
I’d build another engine tomorrow if it wasn’t so bleep’n expensive! I think I got around $9000 into this build! I could have built up a new 427 / 7.0L short block for that and had a 600 HP naturally aspirated monster for that! That might defeat the purpose of my build though.
Clip of first startup above!
Part of the challenge was to see if I could push more efficiency out of a 6.0L than a factory 5.3L. I can say I got WAY more power. The truck is used to climb trails in mountains. The old 5.3L could do it but required WOT quite often and or 4 Low. This new LQ9 build does EVERYTHING and more than the old 5.3L at part throttle!
Changing factory spec, has been a mixed bag of worms. I love the aftermarket camshaft. However, it requires I tune the truck and the learning curve there is extremely steep. I’ve been tuning on this thing for YEARS and I’m still having issues with the calibration. Right now if I run the 100% of the factory LQ9 spark advance the truck is a rocket ship. However, it reports knock randomly even with the “safe” LQ9 spark settings, aka low octane table. False knock? Who knows…
Either way the truck runs like a dream and pulls like a freight train. Efficiency has eluded me. At times depending on the tune it will get same MPG numbers as the LM7. Other times I chase gremlins in my custom build and get horrific mileage. It’s been an adventure to say the least.
Long story short, I’d recommend you rebuild a Chevy small block. I’ve done two of them now and it’s some of the most fun I’ve ever had.
